Ovidiu
How to EncourageMembers to Sign Up with a Business Email in Webflow
Memberscripts needed
https://www.memberstack.com/scripts/require-business-email-for-form-submission
Tutorial
https://www.loom.com/share/f2b9ca865af64c99894627459076e884?sid=f9be6d84-0d03-4e9f-891d-b2e23183498d
Cloneable
https://webflow.com/made-in-webflow/website/block-personal-emails
Why/When would need to Encourage Members to Signup with a Business Email in Webflow?
- Ensuring members work for a company if you only offer B2B products/services.
If your website is strictly about providing B2B products or services, you may want to only allow people with a custom email domain to sign up for an account.
Fortunately, Memberstack provides a very easy way to ensure that only users with a custom domain email sign up to your website and we’re going to look at how you can do it below.
Encouraging users to sign up with a business email in Webflow
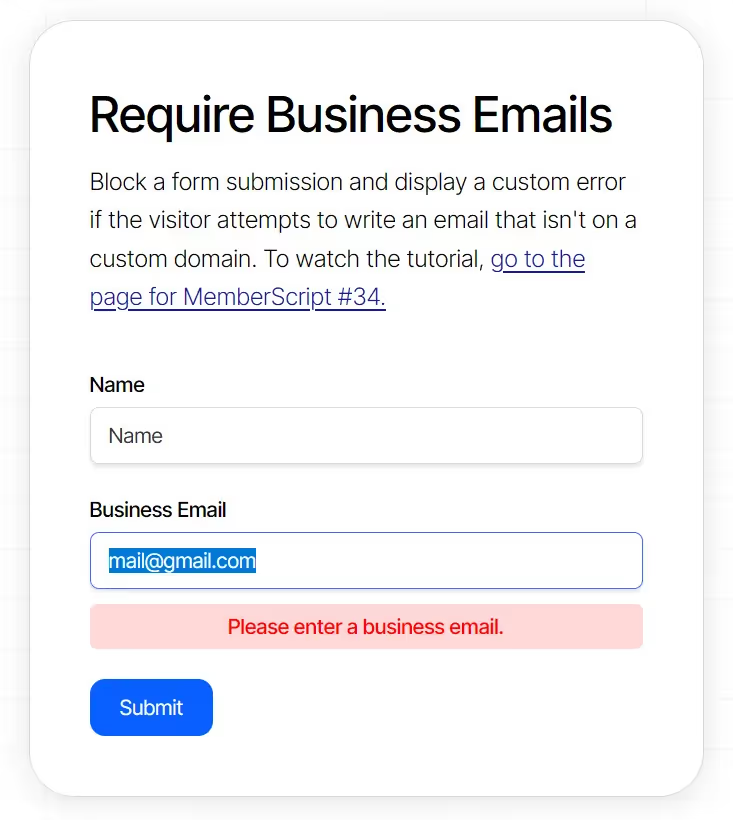
To force users to sign up with a business email, we’re going to use MemberScript #34 – Require Business Email for Form Submission. Follow the link to get the code you’ll need to add to your page and watch a video tutorial on how to set everything up.
Setting everything up
The first thing you’ll need to do is build out the form itself. Once you’ve done that and you’ve added all the fields you need on your form, add this attribute to the form itself:
- ms-code-validate-form=””
Next up, go to your email field and add the following attribute to it:
- ms-code-business-email=””
Now inside the form you’ll need to add a div block that houses the error message and style the message however you want it.
The first thing you’ll need under this div block is some rich text with the CSS class ms-code-validation-error. Under this rich text you’ll need an unordered list and the error message itself will be a list item.
To make the error message look however you want it to, you just need to style the list item itself.
The last thing we need under this div block is to add an HTML Embed alongside the unordered list. Inside the HTML Embed just add this code:
<style>
ul {
padding-left: 0px !important;
</style>
This code will block the default list styling and prevent it from adding any extra padding to the side of the list item we styled earlier.
Making it work
Now that you’ve got the form set up, all you need to do is add the MemberScript #34 custom code to your page, before the closing body tag.
You’ll see in the custom code a list of some of the most popular email domains like gmail.com, outlook.com, yahoo.com, etc. That’s the list of domains that the form won’t allow members to use, so you can edit that list any way you see fit.
Additionally, there’s an error message there for when members try to use any of those domains, so you can edit that message to have it say whatever you want.
Schlussfolgerung
That’s everything, you can now go ahead and test out your form by using any of the email domains listed in the custom code.
If you want to use our demo project to get you started, just click the button below to add it to your Webflow site.

Our demo can help you with a prebuilt form that will block members from using any of the most popular email domains and display a customizable error message.
Take me to the Scripts
https://www.memberstack.com/scripts/require-business-email-for-form-submission
Fügen Sie Ihrem Webflow-Projekt in wenigen Minuten Mitgliedschaften hinzu.
Über 200 kostenlose, klonbare Webflow-Komponenten. Keine Anmeldung erforderlich.
Fügen Sie Ihrem React-Projekt in wenigen Minuten Mitgliedschaften hinzu.

.webp)


.png)
